Gazing up at the night sky has captivated humanity for millennia, and choosing the right telescope can transform casual stargazing into an extraordinary astronomical adventure.
Whether you’re a complete beginner dreaming of viewing Saturn’s rings or an intermediate observer ready to upgrade your equipment, purchasing a telescope represents a significant investment. Unfortunately, many aspiring astronomers make costly mistakes that lead to frustration, unused equipment gathering dust, and missed opportunities to explore the cosmos. Understanding what to look for—and what pitfalls to avoid—will ensure you select a telescope that matches your skill level, observing goals, and budget while providing years of celestial discoveries.
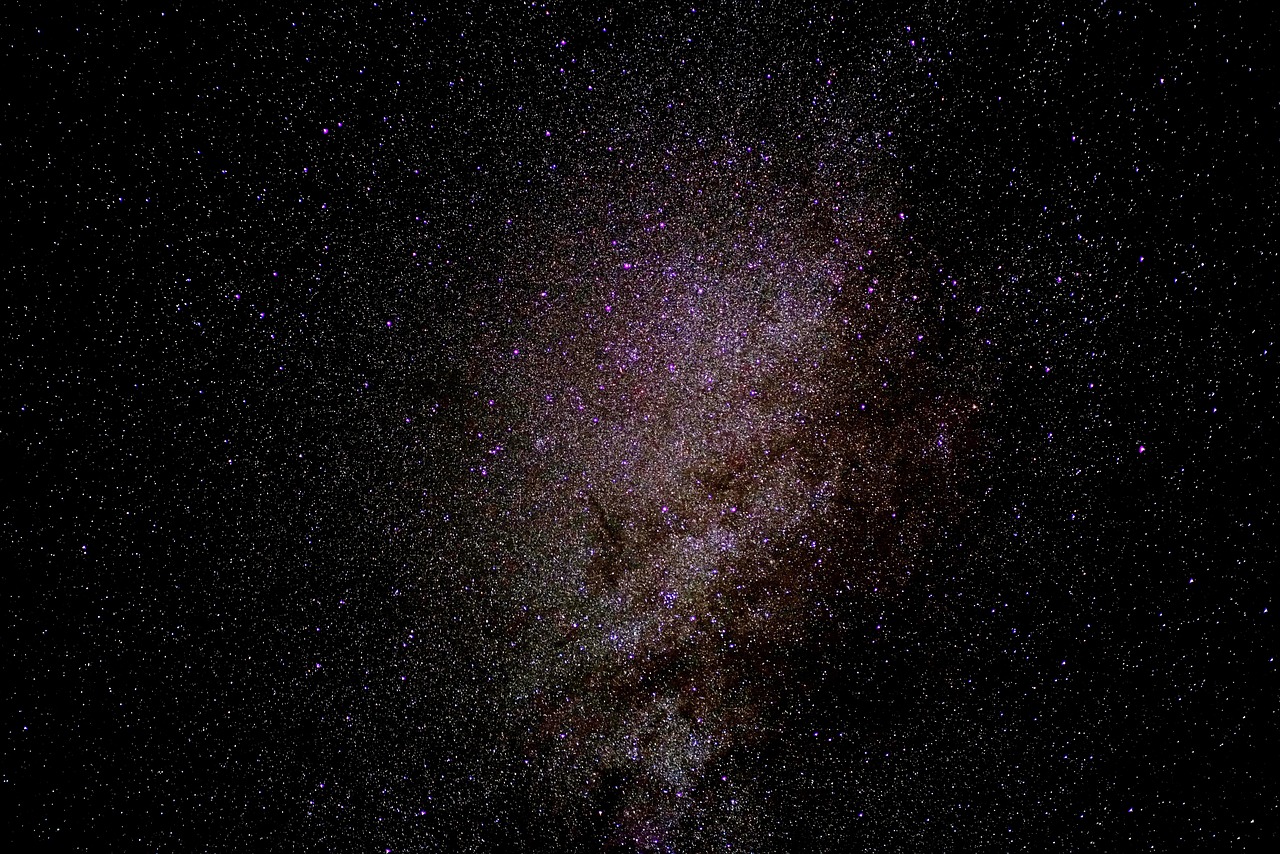
🔭 Understanding Your Stargazing Goals Before Shopping
Before diving into aperture sizes and mount types, take a moment to honestly assess what you want to observe. Different telescopes excel at different astronomical targets, and mismatching your equipment with your interests is one of the most common purchasing mistakes.
Planetary observers need high magnification and sharp optics to discern details on Mars, Jupiter, and Saturn. Deep-sky enthusiasts searching for nebulae, galaxies, and star clusters require larger apertures to gather more light from faint objects. Wide-field observers who enjoy sweeping views of the Milky Way need shorter focal lengths and wider fields of view.
Consider also your observing location. Urban astronomers battling light pollution face different challenges than rural observers under dark skies. Your telescope choice should account for these environmental factors, as some designs perform better than others in light-polluted conditions.
The Aperture Advantage: Why Size Actually Matters
In telescope selection, aperture—the diameter of the main lens or mirror—reigns supreme. This single specification determines how much light your telescope gathers, which directly impacts what you can see. More aperture equals more light-gathering power, revealing fainter objects and finer details.
Many beginners mistakenly prioritize magnification over aperture, attracted by impressive-sounding numbers on department store telescopes. However, magnification without adequate aperture produces dim, blurry images. A quality 6-inch telescope will outperform a cheap 3-inch scope at any magnification.
For practical stargazing, consider these aperture guidelines:
- 60-80mm refractors: Great for Moon and bright planets, portable and low-maintenance
- 4-6 inch telescopes: Excellent all-around performers showing planetary detail and brighter deep-sky objects
- 8-10 inch telescopes: Serious instruments revealing thousands of deep-sky objects with impressive detail
- 12+ inch telescopes: Advanced equipment for dedicated observers with transportation and storage capacity
Remember that larger apertures come with trade-offs including weight, portability, cost, and cooldown time. The best telescope is the one you’ll actually use regularly, not necessarily the biggest one available.
Decoding Telescope Types: Refractors, Reflectors, and Catadioptrics
Three main optical designs dominate the amateur astronomy market, each with distinct advantages and limitations. Understanding these differences prevents purchasing a telescope poorly suited to your needs.
Refractor Telescopes: Classic Simplicity
Refractors use lenses to gather and focus light, offering sharp, high-contrast images with minimal maintenance. These instruments excel at lunar and planetary observation, providing crisp views that reflectors struggle to match. Their sealed optical tubes protect against dust and require virtually no maintenance.
However, quality refractors become expensive as aperture increases, making large refractors prohibitively costly for most amateurs. Additionally, cheaper refractors suffer from chromatic aberration—colored halos around bright objects—unless using premium apochromatic designs.
Reflector Telescopes: Maximum Aperture Value
Reflecting telescopes use mirrors instead of lenses, delivering impressive aperture at affordable prices. An 8-inch reflector costs significantly less than a comparable refractor while gathering much more light. This makes reflectors ideal for deep-sky observation where aperture matters most.
The downside includes periodic mirror alignment (collimation), open tubes that allow dust accumulation, and potential image quality issues from atmospheric turbulence. Reflectors also require cool-down time to reach ambient temperature before delivering optimal performance.
Catadioptric Telescopes: Compact Versatility
Schmidt-Cassegrain and Maksutov-Cassegrain designs combine lenses and mirrors in compact packages, folding the light path to create short, portable tubes with long focal lengths. These versatile instruments handle planetary and deep-sky observation equally well.
Catadioptrics cost more than reflectors of similar aperture and require occasional collimation. Their longer focal ratios also make them less ideal for wide-field deep-sky photography compared to faster reflectors.
Mount Matters More Than You Think
Many first-time buyers obsess over optics while overlooking the mount—a critical mistake that ruins the observing experience. Even premium optics become frustrating when attached to wobbly, difficult-to-use mounts that vibrate with every touch and struggle to track celestial objects smoothly.
Two mount categories serve different purposes and skill levels. Altitude-azimuth (alt-az) mounts move up-down and left-right, offering intuitive operation perfect for beginners. Equatorial mounts align with Earth’s rotational axis, allowing single-axis tracking that follows objects across the sky naturally.
Dobsonian mounts represent a special alt-az category, providing stable platforms for large reflectors at minimal cost. These simple rocker-box designs excel for visual observation but prove challenging for astrophotography due to field rotation.
Equatorial mounts suit astrophotographers and observers wanting motorized tracking. German equatorial mounts (GEMs) dominate this category, though they require polar alignment and feel less intuitive for beginners than alt-az designs.
Computerized GoTo Systems: Convenience or Complication?
Modern telescopes often feature computerized GoTo systems promising to locate thousands of objects automatically. While appealing, these systems introduce complexity that beginners may find overwhelming. Learning the sky manually builds fundamental astronomy knowledge and appreciation.
GoTo systems work wonderfully when properly aligned and maintained but can frustrate users unfamiliar with basic celestial navigation. They also add cost, weight, and battery requirements. Consider whether automatic object location justifies these trade-offs for your observing style.
Avoiding the Department Store Telescope Trap 🛒
Department store telescopes marketed during holidays represent some of the worst purchasing mistakes aspiring astronomers make. These attractively packaged instruments promise impressive specifications at tempting prices but deliver frustrating performance that discourages continued interest in astronomy.
Warning signs of low-quality telescopes include exaggerated magnification claims (“525x power!”), flimsy plastic construction, undersized mounts, poor-quality eyepieces, and non-astronomy brand names. These instruments feature inadequate aperture paired with unstable mounts that shake with the slightest touch.
Rather than shopping at general retailers, purchase from reputable astronomy dealers who specialize in quality equipment. Established brands like Celestron, Orion, Sky-Watcher, Meade, and Explore Scientific offer better value and actual customer support.
Consider that a quality pair of 10×50 binoculars costing under $100 often provides more satisfying celestial views than a $150 department store telescope. Binoculars require no setup, offer wide fields of view perfect for star clusters and the Milky Way, and serve multiple purposes beyond astronomy.
Essential Accessories: What You Actually Need
Telescopes rarely include everything needed for optimal observing experiences. Understanding which accessories add genuine value versus unnecessary extras prevents overspending while ensuring you have the right tools.
Eyepieces: Your View into Space
Budget telescopes typically include cheap eyepieces that significantly compromise the viewing experience. Investing in quality eyepieces transforms optical performance, revealing details that cheap eyepieces obscure.
A good starter eyepiece collection includes three pieces covering low (around 25-30mm), medium (around 12-15mm), and high (around 6-8mm) magnifications. Modern wide-field designs offering 60-82 degrees apparent field of view create immersive experiences worth the premium cost.
Filters: Enhancing Specific Targets
Moon filters reduce glare when observing Earth’s bright satellite, while color filters enhance planetary detail. Light pollution filters help urban observers by blocking specific wavelengths from streetlights while transmitting light from nebulae.
However, no filter can substitute for dark skies or adequate aperture. Beginners should master basic observing before investing heavily in specialized filters.
Additional Useful Accessories
- Red LED flashlight: Preserves night vision while reading charts
- Collimation tools: Essential for reflector owners to maintain optical alignment
- Dew shields: Prevents moisture formation on optics during humid nights
- Quality star charts or astronomy apps: Helps locate and identify objects
- Comfortable observing chair: Reduces neck strain during extended sessions
Navigating the Sky: Learning Your Way Around ⭐
Modern astronomy apps have revolutionized how observers navigate the night sky, making celestial navigation accessible to everyone. These digital tools identify objects in real-time, plan observing sessions, and provide detailed information about thousands of celestial targets.
Quality planetarium apps like SkySafari, Stellarium Mobile, and Star Walk 2 turn smartphones into portable sky guides. Simply point your device skyward, and augmented reality overlays identify stars, planets, and deep-sky objects visible from your location.
While apps provide convenient assistance, consider learning major constellations and bright stars without technological aids. This traditional sky knowledge enriches your connection with the cosmos and ensures you can navigate even when batteries die or technology fails.
Budget Reality: What Different Price Points Deliver
Telescope prices span from under $100 to tens of thousands of dollars. Understanding what various price ranges realistically deliver helps set appropriate expectations and prevents overspending or underbuying.
| Price Range | What to Expect | Best For |
|---|---|---|
| Under $200 | Small refractors, basic reflectors on simple mounts, compromised quality | Children, casual interest, testing hobby commitment |
| $200-$500 | Quality 4-6 inch telescopes, decent mounts, reliable performance | Serious beginners ready to explore regularly |
| $500-$1500 | Excellent 6-10 inch apertures, computerized options, premium accessories | Committed observers, intermediate astronomers |
| $1500+ | Large apertures, premium optics, advanced mounts, astrophotography capability | Advanced observers, astrophotographers, dedicated enthusiasts |
Remember that the used market offers excellent value, with quality telescopes often available at 40-60% of retail prices. Astronomy clubs frequently facilitate equipment sales between members, providing opportunities to purchase well-maintained instruments from knowledgeable sellers.
Testing Before Buying: Smart Shopping Strategies
Whenever possible, observe through telescopes before purchasing. Astronomy clubs host star parties where members share equipment and offer advice based on real-world experience. These events provide invaluable opportunities to compare different designs and apertures under actual viewing conditions.
Many specialty astronomy retailers maintain showrooms where staff demonstrate equipment during daytime and evening viewing sessions. Take advantage of these services to ensure comfort with the telescope’s size, weight, and operational complexity before committing financially.
Read reviews from multiple sources, focusing on long-term user experiences rather than initial impressions. Online astronomy forums contain decades of accumulated wisdom from experienced observers who’ve tested countless instruments.
Portability Versus Performance: Finding Your Balance
Telescope portability dramatically impacts actual usage frequency. The most powerful telescope sitting unused in your garage delivers less value than a smaller instrument you transport regularly to dark-sky sites.
Honestly assess your transportation capabilities, storage space, and physical ability to setup and breakdown equipment. An 80-pound telescope requiring 30 minutes to assemble may seem manageable initially but often discourages spontaneous observing sessions.
Consider also your primary observing location. Backyard astronomers prioritize aperture over portability, while apartment dwellers need compact instruments that fit in vehicles and store in limited spaces.
Some observers maintain multiple telescopes—a grab-and-go instrument for quick sessions and a larger scope for dedicated observing nights. This approach maximizes versatility but obviously requires greater financial investment.
Climate and Seeing Conditions: Environmental Factors
Your local climate and typical atmospheric conditions should influence telescope selection. High-magnification planetary instruments prove frustrating in locations plagued by poor atmospheric seeing, while fast reflectors optimized for deep-sky observation shine under dark, steady skies.
Humid environments require instruments resistant to dew formation, while dusty conditions favor sealed optical tubes. Temperature extremes affect cooldown times, with larger instruments requiring longer to reach thermal equilibrium.
Research your area’s typical seeing conditions and light pollution levels before purchasing. Some locations simply don’t support certain types of observation regardless of equipment quality.
Building Skills Progressively: Matching Equipment to Experience
Resist the temptation to purchase the most advanced equipment as your first telescope. Starting with modest instruments allows you to develop fundamental skills—locating objects manually, judging atmospheric conditions, maintaining equipment—without overwhelming complexity or financial pressure.
Many experienced astronomers recommend beginning with a 6-8 inch Dobsonian reflector. These instruments offer excellent aperture at reasonable prices, simple operation requiring minimal setup, and stable mounts that eliminate frustration. They teach sky navigation naturally while revealing thousands of celestial wonders.
As skills develop and interests clarify, upgrading becomes more focused and cost-effective. You’ll understand exactly which features matter for your specific observing style, preventing expensive mistakes that beginners commonly make.

🌟 Making Your Final Decision With Confidence
Choosing the perfect telescope involves balancing multiple factors—aperture, portability, budget, mount type, and observing goals. No single instrument excels at everything, which means prioritizing what matters most to you personally.
Take time researching options, asking questions in astronomy communities, and observing through different instruments when possible. The right telescope feels natural to operate, fits your physical capabilities, matches your observing ambitions, and inspires you to spend time under the stars regularly.
Remember that the best telescope is ultimately the one you’ll use most often. A modest instrument that excites you and suits your lifestyle delivers more astronomical joy than a premium model that remains unused due to complexity or inconvenience.
Start your journey thoughtfully, avoid common purchasing pitfalls, and you’ll discover that the universe reveals its wonders generously to those equipped with appropriate tools and genuine curiosity. Clear skies await your exploration—choose wisely and enjoy the cosmic adventure ahead!