The night sky has never been more accessible to amateur photographers. With modern smartphone technology advancing rapidly, capturing breathtaking images of the Milky Way is no longer reserved for professionals with expensive equipment.
Whether you’re camping under dark skies or simply escaping city lights for an evening, your smartphone can become a powerful tool for astrophotography. This guide will walk you through everything you need to know to capture stunning cosmic imagery using nothing more than the device in your pocket.
🌌 Understanding What Makes Milky Way Photography Possible on Smartphones
Modern smartphones have revolutionized night sky photography through several key technological advances. Larger camera sensors, improved low-light performance, and sophisticated computational photography algorithms have transformed what was once impossible into achievable art.
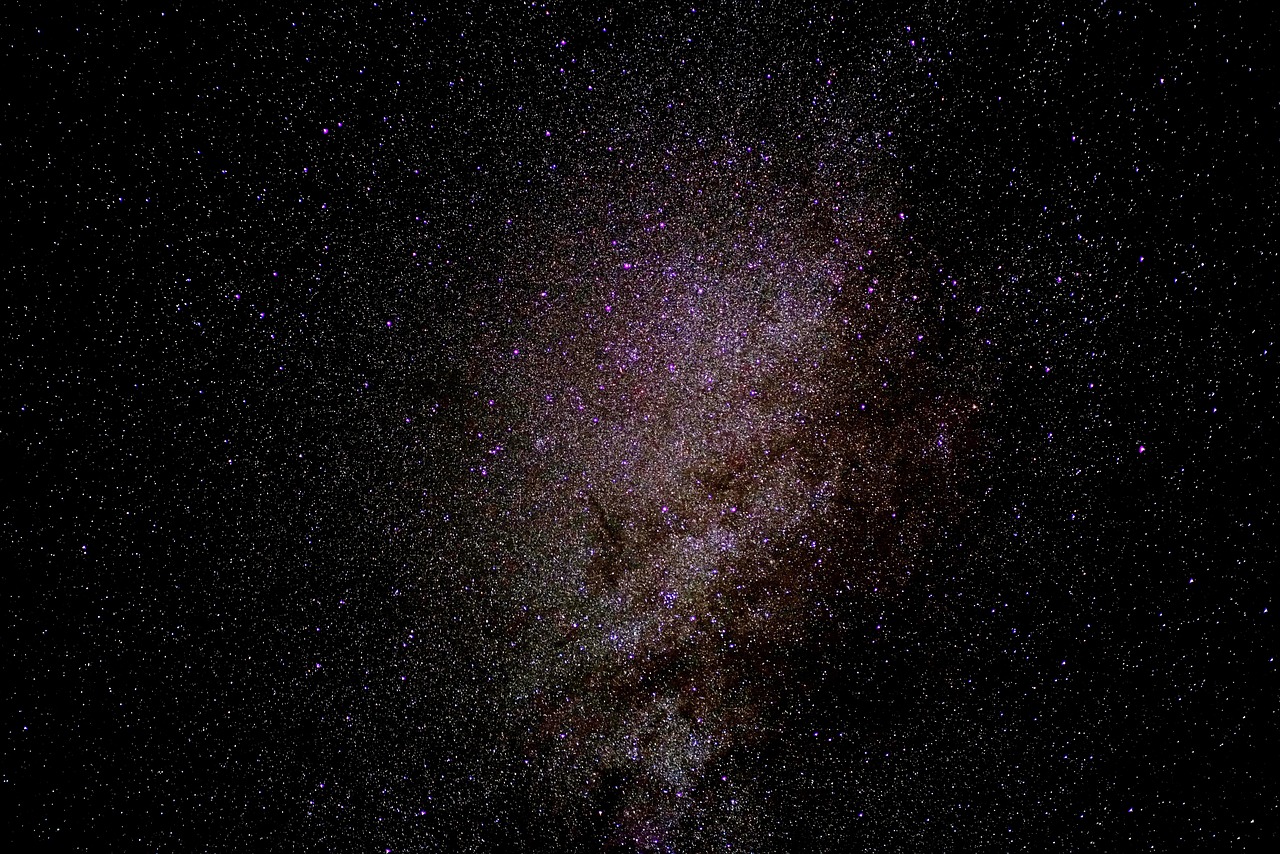
The Milky Way, our home galaxy, stretches across the night sky as a luminous band of stars, dust, and cosmic material. During certain times of the year and in locations with minimal light pollution, this celestial wonder becomes visible to the naked eye and capturable through smartphone cameras.
Contemporary flagship smartphones feature night modes, manual controls, and RAW image capture capabilities that were unimaginable just a few years ago. These features allow extended exposure times, ISO adjustments, and white balance control—all essential for astrophotography.
Essential Equipment Beyond Your Smartphone 📱
While your smartphone is the primary tool, several accessories dramatically improve your chances of capturing stellar Milky Way photographs. These items are relatively inexpensive and highly portable, making them perfect companions for night photography adventures.
The Indispensable Tripod
A stable tripod is absolutely non-negotiable for Milky Way photography. Even the slightest hand movement during long exposures will result in blurred, unusable images. Look for a compact, lightweight tripod specifically designed for smartphones, with adjustable height and a ball head for precise positioning.
Smartphone tripods range from pocket-sized flexible models with bendable legs to more robust aluminum structures. The investment of twenty to fifty dollars in a quality tripod will pay dividends in image sharpness and composition flexibility.
Additional Helpful Accessories
Consider bringing a portable battery pack to ensure your smartphone doesn’t die during extended shooting sessions. Night photography drains batteries quickly, especially when using screen brightness at maximum and running camera apps continuously.
A red-light headlamp preserves your night vision while allowing you to adjust settings and navigate in darkness. White light disrupts your eyes’ adaptation to low-light conditions and can take up to thirty minutes to recover fully.
Timing Your Cosmic Photoshoot: When and Where to Shoot ⭐
Success in Milky Way photography depends heavily on choosing the right time and location. Understanding seasonal visibility, lunar phases, and light pollution factors will dramatically increase your success rate.
Seasonal Considerations for Milky Way Visibility
In the Northern Hemisphere, the Milky Way’s galactic core is most visible from March through October, with peak visibility occurring between May and August. During these months, the brightest and most photogenic portion of the galaxy appears in the southern sky during evening and nighttime hours.
For Southern Hemisphere photographers, the galactic core remains visible year-round but appears highest in the sky during winter months from May to August. The viewing angle from southern latitudes often provides more dramatic perspectives of the galactic center.
Moon Phases and Their Impact
The moon acts as natural light pollution, washing out fainter stars and reducing the Milky Way’s contrast. Plan your photography sessions around new moon phases when the sky is darkest. The week before and after a new moon also provides acceptable conditions, though not ideal.
Use astronomy apps to track moon phases, rise and set times, and plan accordingly. Even a crescent moon can impact your images if it’s bright and positioned near your composition.
Escaping Light Pollution
Light pollution from cities, towns, and even small communities significantly diminishes your ability to see and photograph the Milky Way. Travel to locations with Bortle scale ratings of 3 or lower for best results—these are typically rural areas far from urban centers.
Online light pollution maps help identify dark sky locations near you. National parks, forests, and designated Dark Sky Reserves offer some of the best viewing conditions. Even driving thirty to sixty minutes away from city centers can make a remarkable difference.
Configuring Your Smartphone Camera Settings 📸
Proper camera configuration separates amateur snapshots from stunning astrophotography. Most modern smartphones include manual or “pro” camera modes that unlock essential controls for night sky photography.
Accessing Manual Camera Controls
Navigate to your smartphone’s camera app and locate the manual, pro, or expert mode. This interface provides access to exposure time, ISO sensitivity, focus control, and white balance adjustments that automatic modes won’t provide.
If your native camera app lacks sufficient manual controls, dedicated astrophotography apps offer enhanced functionality. These applications provide greater flexibility and often include features specifically designed for capturing the night sky.
Optimal Exposure Settings for Milky Way Photography
Start with an exposure time between 15 and 30 seconds. Longer exposures capture more light but risk star trailing—the apparent movement of stars caused by Earth’s rotation. The specific maximum exposure depends on your smartphone’s focal length and desired effect.
Set your ISO between 1600 and 3200 initially, then adjust based on results. Higher ISO values increase sensitivity to light but also introduce digital noise. Modern smartphones handle high ISO remarkably well, but finding the optimal balance for your specific device requires experimentation.
Use the widest aperture available on your smartphone—typically f/1.8 to f/2.4 on main cameras. Wider apertures allow more light to reach the sensor during exposure, crucial for capturing faint celestial objects.
Focus and White Balance Adjustments
Manual focus is critical because autofocus systems struggle in low-light conditions. Set your focus to infinity or slightly before infinity to ensure stars appear sharp. Many camera apps provide focus peaking or magnification tools to verify sharp focus.
For white balance, start with the daylight or 5500K preset to maintain natural star colors. Experiment with slightly cooler temperatures (4500-5000K) to enhance blue tones, or warmer settings (6000-6500K) to emphasize golden hues in the galactic core.
Composition Techniques That Elevate Your Astrophotography 🎨
Technical settings alone don’t create compelling images—thoughtful composition transforms Milky Way photographs from documentary snapshots into artistic statements. Incorporating foreground elements, applying the rule of thirds, and considering perspective all contribute to memorable images.
Including Foreground Interest
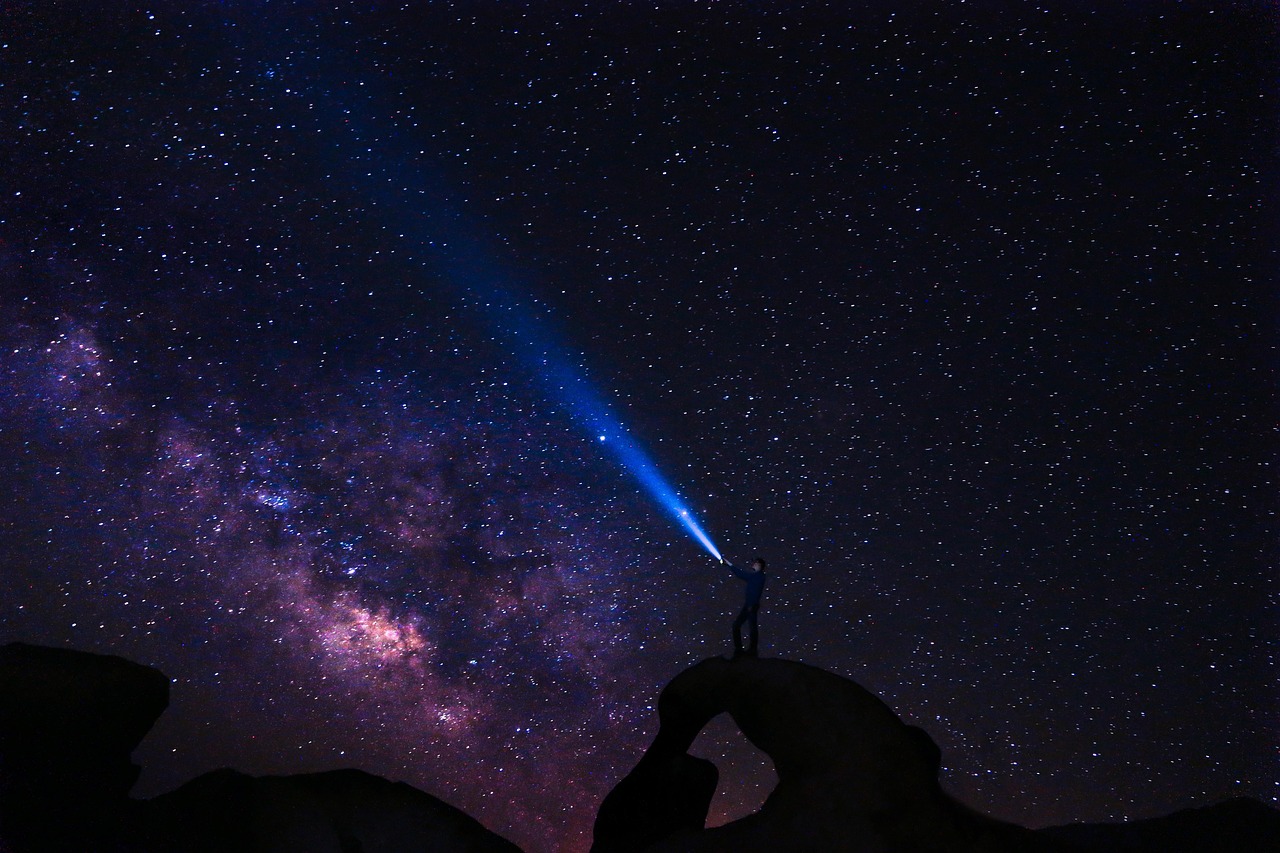
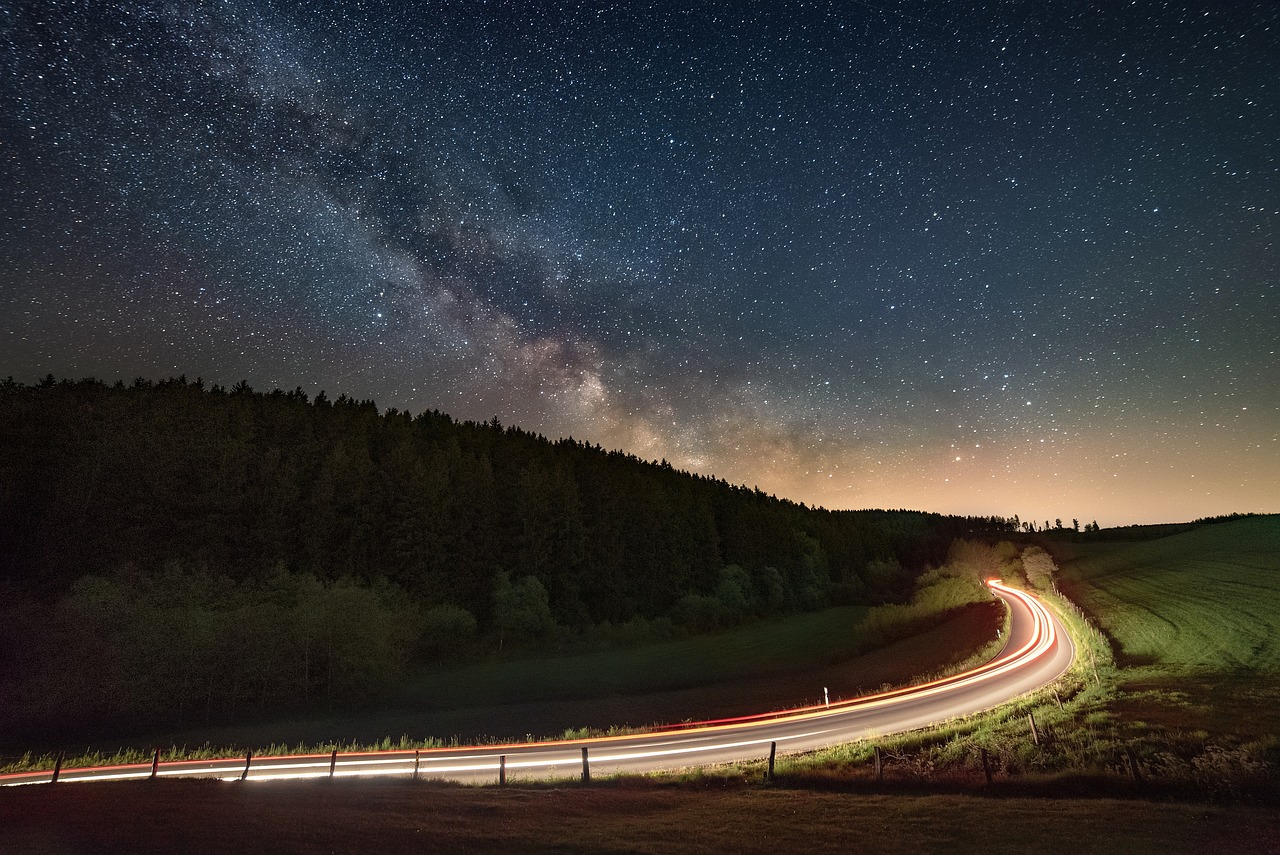
Empty sky images rarely captivate viewers. Include interesting foreground elements like silhouetted trees, mountains, rock formations, abandoned buildings, or bodies of water. These terrestrial subjects provide scale, context, and visual anchor points that guide viewers through your composition.
Position yourself so the Milky Way arches over or behind your chosen foreground element. This relationship between earth and cosmos creates depth and tells a more complete visual story than sky alone.
Applying Compositional Guidelines
The rule of thirds works beautifully in astrophotography. Place the horizon along the lower third line, allowing the sky to dominate the frame. Position the brightest or most interesting portion of the Milky Way at intersection points where gridlines meet.
Experiment with both horizontal and vertical orientations. Portrait orientation works well when the Milky Way rises vertically from the horizon, while landscape orientation suits wide panoramic scenes.
Scout Locations During Daylight
Visit your intended shooting location during daylight hours to identify compositions, assess safety, and plan logistics. Attempting to scout in complete darkness wastes valuable shooting time and poses safety risks.
Note where the Milky Way will appear relative to your foreground elements using astronomy apps with augmented reality features. This preparation ensures you arrive with a clear plan when darkness falls.
Capturing the Shot: Step-by-Step Process 🌠
With preparation complete, equipment ready, and settings configured, you’re ready to capture stunning Milky Way photographs. Follow this systematic approach to maximize your success.
First, mount your smartphone securely on your tripod and frame your composition. Double-check that the tripod is stable and positioned on level ground to prevent unwanted movement during exposure.
Access your camera’s manual mode and input your starting settings: 20-second exposure, ISO 2000, widest aperture, manual focus set to infinity, and daylight white balance. These baseline settings work for most situations and provide a starting point for refinement.
Use your camera app’s timer function or a remote shutter to trigger the exposure without physically touching the phone. Even gentle pressure on the screen can introduce vibration that ruins sharpness. A 2 to 5-second delay allows any vibrations to settle before exposure begins.
Take multiple shots with varying settings. Bracket your exposures by adjusting ISO and exposure time in increments. This approach ensures you’ll capture usable images even if initial settings prove suboptimal, and provides material for potential image stacking later.
Review your images periodically by zooming in to check focus sharpness and overall exposure. Make adjustments as needed, but avoid checking too frequently—preserving your night vision is important for seeing composition elements clearly.
Post-Processing: Enhancing Your Cosmic Captures ✨
Raw Milky Way images straight from your smartphone often appear underwhelming—post-processing unlocks their full potential. Strategic editing enhances contrast, reveals hidden details, and creates the dramatic aesthetic associated with professional astrophotography.
Mobile Editing Applications
Numerous powerful mobile editing applications provide professional-grade tools for enhancing night sky photographs. These apps offer adjustment layers, selective editing, and specialized filters designed specifically for astrophotography.
Look for editing apps that support RAW file formats if your smartphone captures in RAW. These files contain significantly more image data than JPEGs, providing greater flexibility during editing without quality degradation.
Essential Editing Adjustments
Begin by increasing contrast to separate the Milky Way from the surrounding sky. This adjustment makes the galactic structure more pronounced and visually striking.
Boost clarity or structure settings to enhance fine details within the Milky Way’s dust lanes and star fields. Use this adjustment sparingly—excessive clarity creates unnatural halos and artifacts.
Adjust highlights and shadows to reveal details in both bright galactic regions and darker areas of sky. Lowering highlights prevents blown-out areas while raising shadows unveils hidden structure.
Fine-tune color saturation and vibrance to enhance the Milky Way’s natural hues. The galactic core often displays warm orange and yellow tones contrasting with cooler blue stars—gentle enhancement brings these colors forward without appearing oversaturated.
Apply noise reduction carefully to minimize grain from high ISO settings while preserving star sharpness. Over-aggressive noise reduction creates a plastic, unnatural appearance and eliminates fine stars.
Advanced Techniques for Next-Level Results 🚀
Once you’ve mastered basic Milky Way photography, advanced techniques can elevate your work further. These methods require additional time and effort but produce exceptional results.
Image Stacking for Reduced Noise
Capture multiple identical exposures of the same composition, then combine them using specialized stacking software. This technique averages out random noise patterns while reinforcing actual image details, resulting in cleaner images with less grain.
Even stacking just 5 to 10 images produces noticeable improvements. More advanced photographers stack dozens of exposures for extremely clean, detailed results rivaling dedicated astronomy cameras.
Creating Panoramic Milky Way Images
Capture a series of overlapping images across the sky, then stitch them together using panorama software. This technique creates ultra-wide perspectives that showcase the Milky Way’s full arc across the heavens.
Maintain consistent settings across all frames and overlap each shot by approximately 30 percent. Keep your tripod level and rotate only horizontally to ensure successful stitching.
Incorporating Time-Lapse Elements
Create dramatic time-lapse sequences showing the Milky Way’s movement across the sky throughout the night. This requires capturing hundreds of images over several hours, then compiling them into video sequences.
Ensure your smartphone has sufficient battery power and storage capacity for extended shooting sessions. Many camera apps include built-in intervalometer functions for automated time-lapse capture.
Common Challenges and How to Overcome Them 🔧
Every astrophotographer encounters obstacles—understanding common problems and their solutions prevents frustration and wasted nights under the stars.
Star trailing occurs when exposure times exceed Earth’s rotation threshold. Shorten exposure duration or use the 500 rule: divide 500 by your smartphone’s focal length to determine maximum exposure time before trailing becomes visible.
Excessive noise plagues high ISO images. Shoot RAW format for better noise reduction flexibility, use lower ISO settings with longer exposures when possible, or employ image stacking techniques to average out noise.
Poor focus ruins otherwise perfect images. Use live view magnification to verify stars appear as sharp points, not soft blobs. Focus on a bright star or distant light, then lock focus before recomposing.
Light pollution contaminates images with color casts and reduced contrast. Travel further from urban areas, shoot during darker moon phases, or use gradient filters in post-processing to correct uneven sky illumination.
Safety and Etiquette for Night Photography Adventures 🌙
Photographing under dark skies presents unique safety considerations. Always inform someone of your location and expected return time when shooting in remote areas. Bring flashlights, first aid supplies, and appropriate clothing for overnight temperature drops.
Be aware of wildlife in your shooting location. Many animals are most active during nighttime hours, and surprising them can create dangerous situations for both photographer and wildlife.
Respect private property and designated restricted areas. Many excellent dark sky locations exist on public lands, making trespassing unnecessary and potentially illegal.
When shooting in areas where other photographers or stargazers are present, minimize light usage that might interfere with others’ activities. Red lights preserve night vision better than white lights and cause less disruption.
Continuing Your Astrophotography Journey 🌟
Smartphone Milky Way photography represents just the beginning of a vast and rewarding pursuit. Each clear night offers new opportunities to refine techniques, explore compositions, and capture the cosmos in all its glory.
Join online communities dedicated to astrophotography where enthusiasts share locations, techniques, and constructive feedback. These communities provide inspiration, motivation, and valuable knowledge from experienced photographers.
Keep practicing during every available opportunity. Astrophotography skills develop through repeated experience under various conditions—each session teaches valuable lessons that improve future results.
The universe awaits your creative vision, and your smartphone provides everything needed to capture its breathtaking beauty. Clear skies and successful shooting!