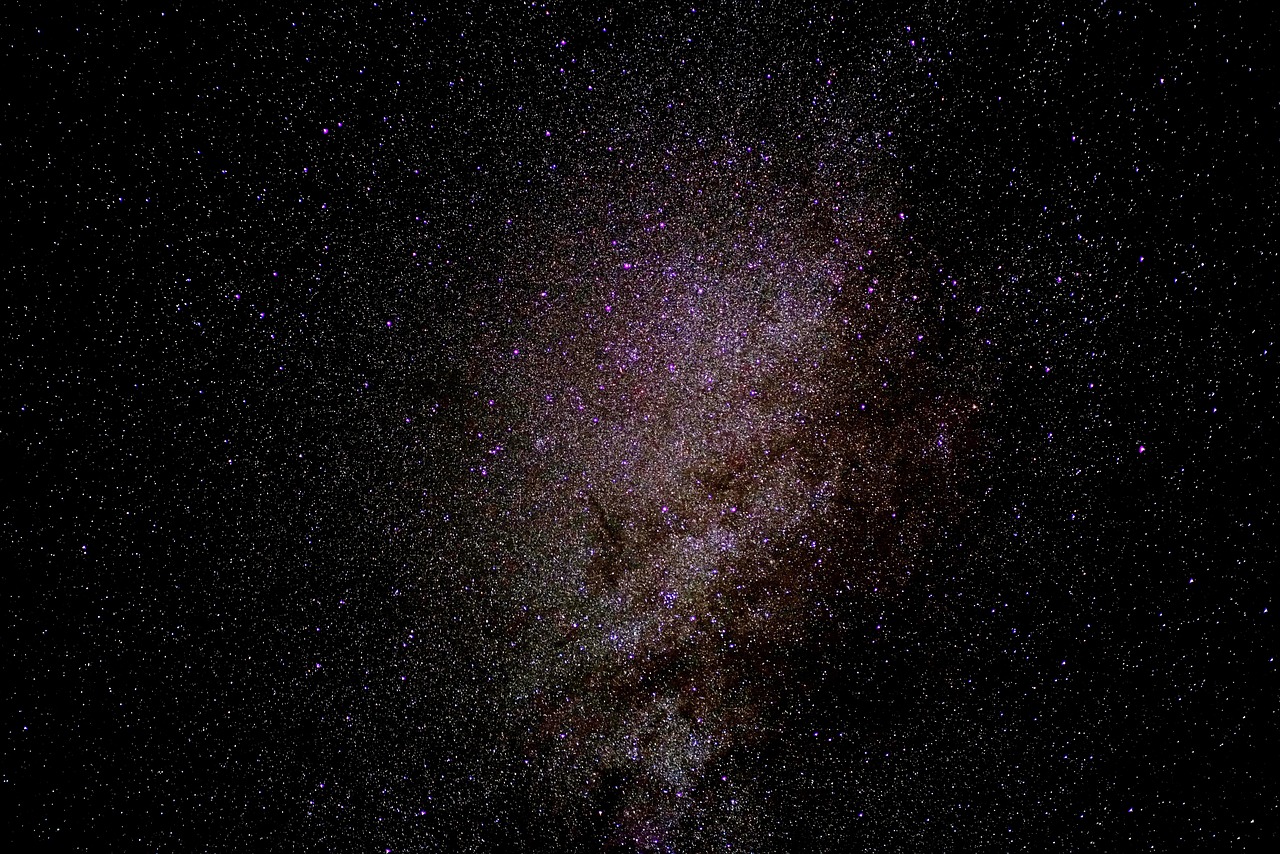
Ever looked up at a starry night sky and wished you could capture its magic? With today’s smartphone cameras and editing tools, creating breathtaking astrophotography is more accessible than ever before.
The universe above us holds infinite beauty, and now you can transform your raw night sky photos into stunning celestial masterpieces right from your phone. Whether you captured the Milky Way, star trails, or the moon’s craters, mobile editing apps offer powerful features that once required expensive desktop software. This guide will walk you through easy, effective techniques to enhance your astrophotos and make them truly shine.
📱 Why Mobile Editing Works Perfectly for Astrophotography
Mobile phone editing has revolutionized how photographers approach post-processing. Modern smartphones pack impressive computational power, and dedicated apps offer professional-grade tools that fit in your pocket. You can edit on location, share instantly, and maintain a seamless workflow from capture to publication.
The convenience factor cannot be overstated. After spending hours in the cold night air capturing stars, you can begin enhancing your images immediately, even before heading home. This instant feedback helps you learn faster and understand which shooting techniques produce the best results for your editing style.
🌟 Essential Apps That Transform Night Sky Photos
Choosing the right editing application makes all the difference in astrophotography post-processing. Several excellent options cater specifically to the unique challenges of night sky images, offering specialized tools for noise reduction, star enhancement, and color correction.
Adobe Lightroom Mobile: The Professional Choice
Adobe Lightroom Mobile stands as the gold standard for mobile photo editing. Its powerful RAW processing capabilities, selective masking tools, and precise color adjustments make it ideal for astrophotography. The app syncs seamlessly across devices and offers both free and premium features.
Snapseed: Free Yet Powerful
Google’s Snapseed provides an impressive array of tools without any cost. Its selective editing features, structure tool, and healing brush work wonderfully for cleaning up astrophotos. The interface is intuitive, making it perfect for beginners who want professional results.
PixelLab and Specialized Stacking Apps
For more advanced techniques like star stacking, specialized apps can combine multiple exposures to reduce noise and enhance detail. These tools mimic desktop astronomy software but work entirely on mobile platforms, opening new creative possibilities for dedicated astrophotographers.
✨ Fundamental Editing Techniques for Stellar Results
Understanding basic editing principles specific to astrophotography will dramatically improve your results. Night sky images present unique challenges that require different approaches than daytime photography, particularly regarding exposure, contrast, and color balance.
Start With Exposure Adjustments
Your first step should always involve balancing the overall exposure. Astrophotos often appear darker than intended due to challenging shooting conditions. Gently increase exposure while monitoring the histogram to ensure you’re not losing detail in the brighter stars or nebulae.
Avoid pushing exposure too far, as this amplifies noise significantly. Instead, work incrementally, making small adjustments of +0.3 to +0.5 stops at a time. Pay attention to how the adjustment affects different parts of your image, particularly the darkest sky regions and brightest celestial objects.
Contrast and Clarity: Bringing Stars to Life
Increasing contrast helps separate stars from the background sky, making constellations pop dramatically. However, excessive contrast can create unnatural halos around bright objects. Aim for balance that enhances visibility without introducing artifacts.
The clarity or structure slider works wonders on astrophotos by enhancing mid-tone contrast. This makes the Milky Way’s dust lanes more visible and gives individual stars better definition. Use this tool carefully, as too much creates a harsh, over-processed appearance.
🎨 Color Correction for Authentic Celestial Hues
Color management separates good astrophotos from truly stunning ones. The night sky contains subtle color variations that reveal the temperature and composition of celestial objects. Proper color editing enhances these natural tones while maintaining realism.
White Balance: Finding the Perfect Temperature
Most astrophotos benefit from slightly cooler white balance settings, typically between 3200K and 4000K. This preserves the deep blue quality of night skies while preventing stars from appearing overly yellow or orange. Experiment with temperature until the overall mood feels right.
Don’t obsess over perfectly neutral white balance. The night sky naturally displays color casts depending on atmospheric conditions, light pollution, and moonlight. Sometimes a warmer tone creates a more appealing, romantic atmosphere, especially for Milky Way compositions.
Selective Color Enhancement
Most editing apps offer HSL (Hue, Saturation, Luminance) controls that let you adjust specific color channels independently. For astrophotography, focus on enhancing blues, cyans, and magentas, which dominate night sky imagery. Increase saturation moderately to make nebulae and star colors more vibrant.
Red channel adjustments prove particularly useful for light pollution removal. Decreasing red luminance and saturation helps neutralize the orange glow from city lights that often plagues urban astrophotography. This technique recovers sky detail that initially appears washed out.
🌌 Advanced Techniques for Professional-Looking Results
Once you’ve mastered fundamental adjustments, these advanced techniques will elevate your astrophotos to the next level. These methods require practice but produce dramatically improved images that stand out from typical smartphone night photography.
Noise Reduction Without Losing Stars
High ISO settings necessary for astrophotography inevitably introduce noise. The challenge lies in reducing noise while preserving star detail. Apply luminance noise reduction moderately, then use color noise reduction more aggressively, as color noise appears less natural and more distracting.
Avoid noise reduction tools that blur the entire image indiscriminately. Look for apps offering selective noise reduction or masking capabilities. Apply noise reduction primarily to empty sky areas while protecting star clusters and the Milky Way core from excessive smoothing.
Selective Adjustments and Masking
The most powerful editing technique involves applying different adjustments to different image areas. Use gradient masks to darken foreground elements while brightening the sky, or apply radial filters to enhance specific constellation regions without affecting the entire composition.
Lightroom Mobile and Snapseed both offer excellent selective editing tools. Create masks around interesting celestial features like the Milky Way core, then boost exposure, contrast, and saturation within those specific areas. This directed approach creates depth and guides viewers’ eyes through your composition.
Dehaze: The Secret Weapon
The dehaze slider works almost magically on astrophotos. Originally designed to cut through atmospheric haze in landscape photography, it dramatically enhances Milky Way visibility by increasing local contrast and reducing atmospheric interference. Use it generously but watch for unnatural color shifts.
Combine dehaze with slight negative exposure compensation to prevent stars from blooming excessively. This combination reveals incredible detail in nebulae and dust lanes while maintaining natural-looking star sizes. It’s one of the fastest ways to transform a flat night sky image into something spectacular.
⭐ Sharpening and Final Detail Enhancement
Proper sharpening represents the final polish that makes astrophotos truly crisp and professional. Mobile cameras and editing compression can soften images, so strategic sharpening recovers fine detail and makes stars sparkle.
Global Sharpening Approach
Apply moderate global sharpening between 30-50 on most apps’ scales. Adjust the radius to affect appropriate detail sizes—smaller radii sharpen fine details like individual stars, while larger radii affect broader structures like nebula edges and the Milky Way.
Use masking or threshold controls to prevent sharpening from amplifying noise in smooth sky areas. You want sharpening to affect star edges and contrasty details while leaving noisy dark areas untouched. This selective approach creates clean, professional results.
Structure and Texture Tools
Many modern editing apps include structure, texture, or micro-contrast tools that enhance fine details differently than traditional sharpening. These prove exceptionally useful for astrophotography, bringing out subtle variations in nebulae and star fields without creating harsh edges.
Experiment with combining moderate sharpening with structure adjustments for optimal results. Each tool works on different spatial frequencies, so using both creates better overall enhancement than relying on either alone. The key is subtlety—if adjustments are obvious, you’ve gone too far.
🌠 Common Mistakes and How to Avoid Them
Even experienced photographers make characteristic errors when editing astrophotos on mobile devices. Being aware of these pitfalls helps you develop better editing judgment and avoid the over-processed look that plagues many night sky images.
Over-Saturation of Colors
The temptation to maximize color vibrancy often leads to garish, unnatural results. Real night skies display subtle, delicate colors that become cartoonish when oversaturated. Keep saturation adjustments modest, typically no more than +15 to +25, and always zoom in to check for color banding or posterization.
Excessive Noise Reduction
Applying too much noise reduction creates a waxy, artificial appearance and eliminates faint stars entirely. It’s better to retain some visible noise than to produce an unnaturally smooth sky. Modern audiences accept reasonable noise levels in astrophotos, understanding the technical challenges involved.
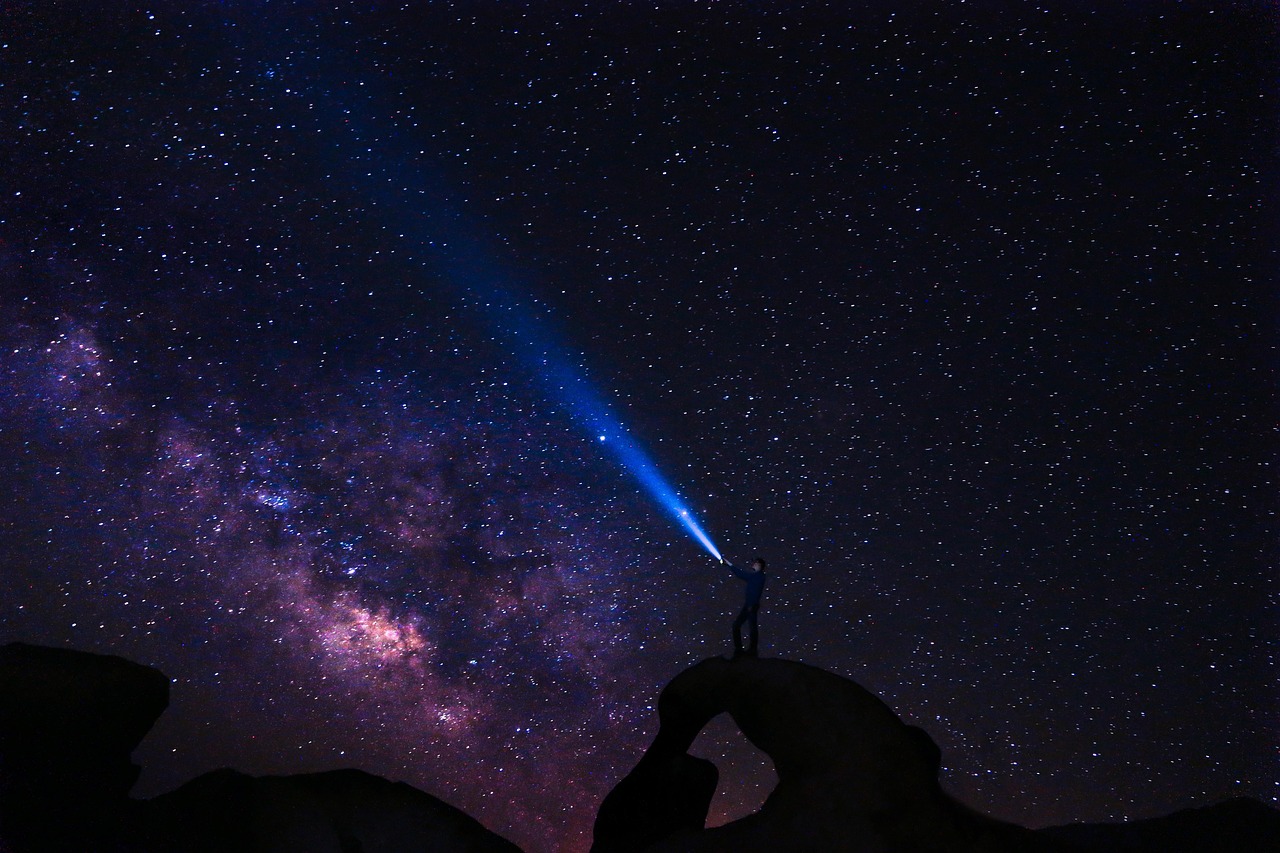
Ignoring Composition Elements
Don’t focus exclusively on the sky while neglecting foreground elements. Silhouetted landscapes, trees, or structures add context and scale to astrophotos. Apply separate adjustments to these elements, perhaps lightening shadows slightly or adding warmth to create visual interest throughout the frame.
💡 Workflow Tips for Efficient Mobile Editing
Developing a consistent editing workflow saves time and produces more reliable results. Following a systematic approach ensures you don’t overlook important adjustments and makes it easier to develop your unique editing style.
Start with technical corrections: white balance, exposure, and highlight/shadow recovery. Next, address contrast, clarity, and dehaze to establish the overall mood. Then move to color adjustments, followed by noise reduction and sharpening. Finally, apply selective edits and creative touches. This sequence builds logically from fundamental to refined adjustments.
Save your favorite adjustment combinations as presets when possible. Most advanced apps allow preset creation, letting you apply your signature look to new images instantly. These serve as excellent starting points that you can then customize for each specific photo’s needs.
🌙 Pushing Your Skills Further
Mastering mobile astrophoto editing is an ongoing journey. As you become comfortable with basic techniques, challenge yourself with more ambitious projects like panoramas, time-lapse sequences, or meteor shower composites.
Study work from accomplished astrophotographers to understand how they balance realism with visual impact. Join online communities where you can share images, receive constructive feedback, and learn new techniques. The astrophotography community is remarkably supportive and eager to help newcomers develop their skills.
Remember that editing should enhance what you captured, not compensate for poor shooting technique. Continue improving your camera skills alongside your editing abilities. Understanding how in-camera settings affect your raw files helps you make better decisions during both capture and post-processing.
🎯 Making Your Astrophotos Stand Out
Technical excellence alone doesn’t guarantee compelling images. The most memorable astrophotos combine technical quality with creative vision and emotional resonance. Think about the story you want to tell and the feeling you want to evoke when viewers see your work.
Experiment with different editing styles to find your unique voice. Some astrophotographers prefer high-contrast, deeply saturated treatments, while others favor subtle, naturalistic approaches. Neither is inherently better—what matters is consistency and intentionality in your creative choices.
Consider the final presentation context when editing. Images destined for Instagram might benefit from bolder adjustments that grab attention in small thumbnails, while photos for printing or portfolio websites might warrant more restrained, nuanced processing that reveals itself gradually upon closer inspection.
✅ Your Journey to Stellar Astrophotos Starts Now
Mobile editing has democratized astrophotography post-processing, making professional-quality results accessible to anyone with a smartphone and passion for the night sky. The techniques covered here provide a solid foundation for transforming your raw captures into stunning celestial images.
Start simple, focusing on exposure, contrast, and color balance before attempting advanced techniques. As these fundamentals become second nature, gradually incorporate selective adjustments, sophisticated noise reduction, and creative enhancements. Most importantly, develop your own style through experimentation and practice.
The stars have inspired humanity since the beginning of time. Now you have the tools to share that inspiration with others through beautifully edited astrophotos created entirely on your phone. Clear skies and happy editing! 🌟