Night sky photography transforms ordinary stargazers into celestial storytellers. Capturing the cosmos requires more than just pointing your camera upward—it demands careful planning, technical knowledge, and patience.
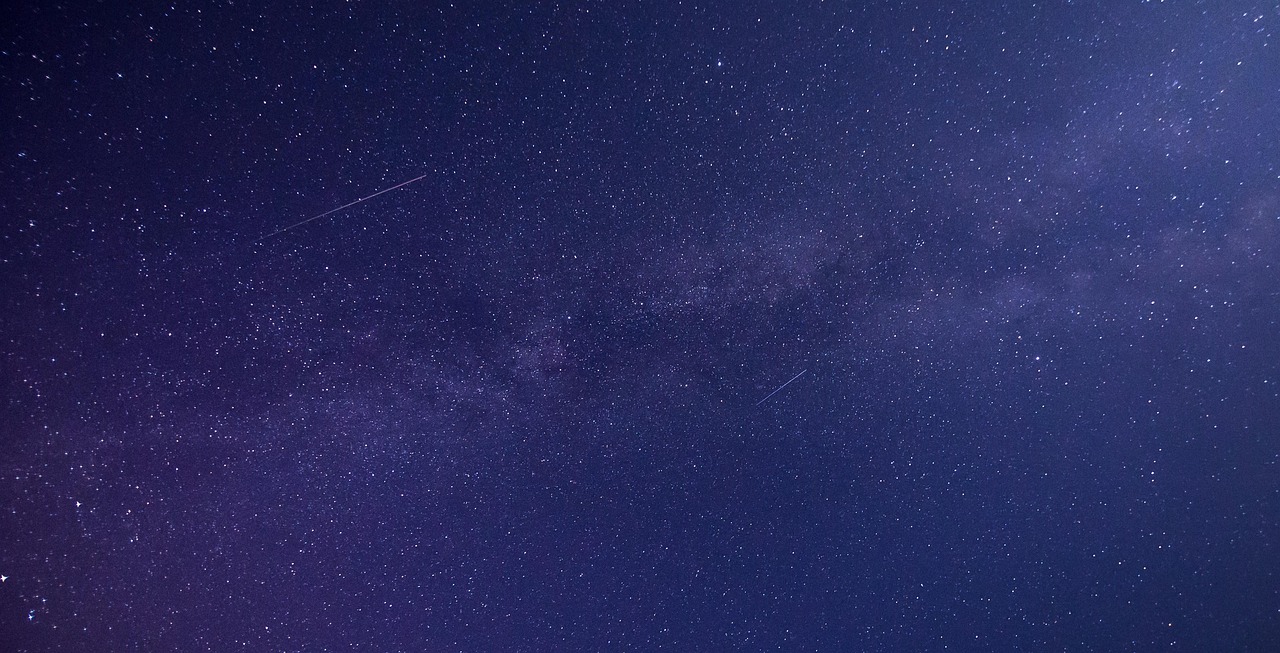
Whether you’re dreaming of photographing the Milky Way’s ethereal glow, capturing meteor showers streaking across the heavens, or documenting the mesmerizing trails of stars as Earth rotates, this comprehensive guide will equip you with everything needed to plan and execute the perfect astrophotography adventure. From location scouting to equipment preparation, we’ll explore every essential element that separates breathtaking celestial images from disappointing blurry snapshots.
🌙 Understanding the Fundamentals of Night Sky Photography
Before venturing into the darkness with your camera, it’s crucial to grasp what makes night sky photography unique. Unlike daytime photography, astrophotography challenges photographers with extreme low-light conditions, constantly moving subjects, and the need for specialized techniques.
The stars you photograph aren’t actually stationary—Earth’s rotation creates apparent movement that becomes visible in exposures longer than 20-30 seconds. This phenomenon can either be your creative ally or your enemy, depending on whether you’re aiming for sharp pinpoint stars or dramatic star trails.
Successful night sky photography hinges on three critical factors: location darkness, atmospheric conditions, and timing. Light pollution from cities can wash out faint celestial objects, while clouds, humidity, and atmospheric turbulence can ruin even the most meticulously planned shoot. Understanding moon phases is equally important—a bright full moon can illuminate landscapes beautifully but simultaneously obscure dimmer stars and the Milky Way’s delicate details.
Choosing the Perfect Location for Stellar Photography
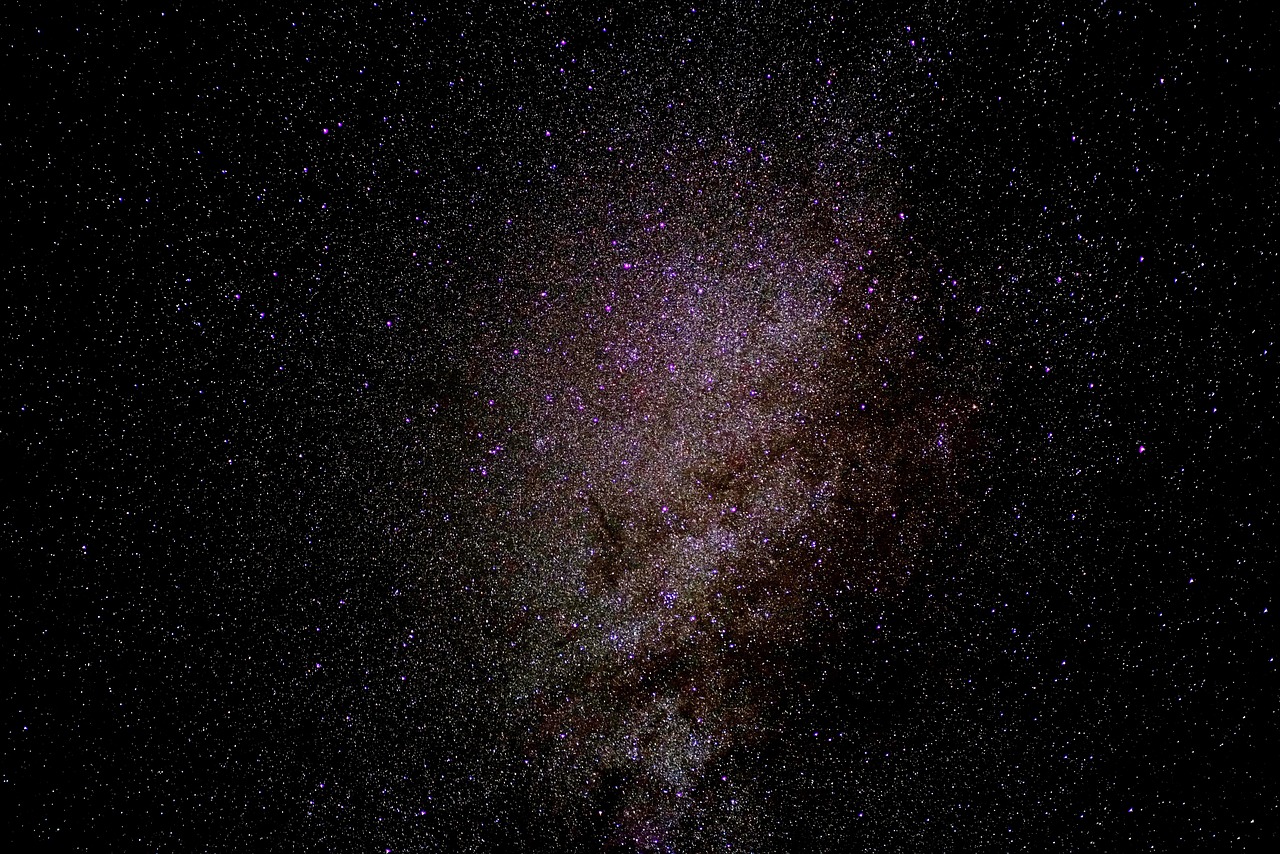
Location selection makes or breaks your astrophotography session. The darkest skies produce the most spectacular results, revealing thousands of stars invisible to urban dwellers and allowing the Milky Way’s core to shine brilliantly across your frame.
Identifying Dark Sky Locations
Dark sky sites exist at varying distances from light-polluted areas. The Bortle Scale, ranging from Class 1 (pristine dark skies) to Class 9 (inner-city skies), helps photographers quantify light pollution levels. For exceptional Milky Way photography, aim for Bortle Class 3 or darker locations.
National parks, designated Dark Sky Reserves, remote deserts, and mountainous regions typically offer excellent conditions. Research your region’s dark sky areas using light pollution maps available online. These resources display color-coded maps showing light pollution intensity, helping you identify potential shooting locations within reasonable driving distance.
Scouting Locations During Daylight
Never underestimate the importance of daytime location scouting. Visiting your chosen spot during daylight allows you to identify compelling foreground elements, potential compositional anchors, and any obstacles or hazards that darkness might conceal.
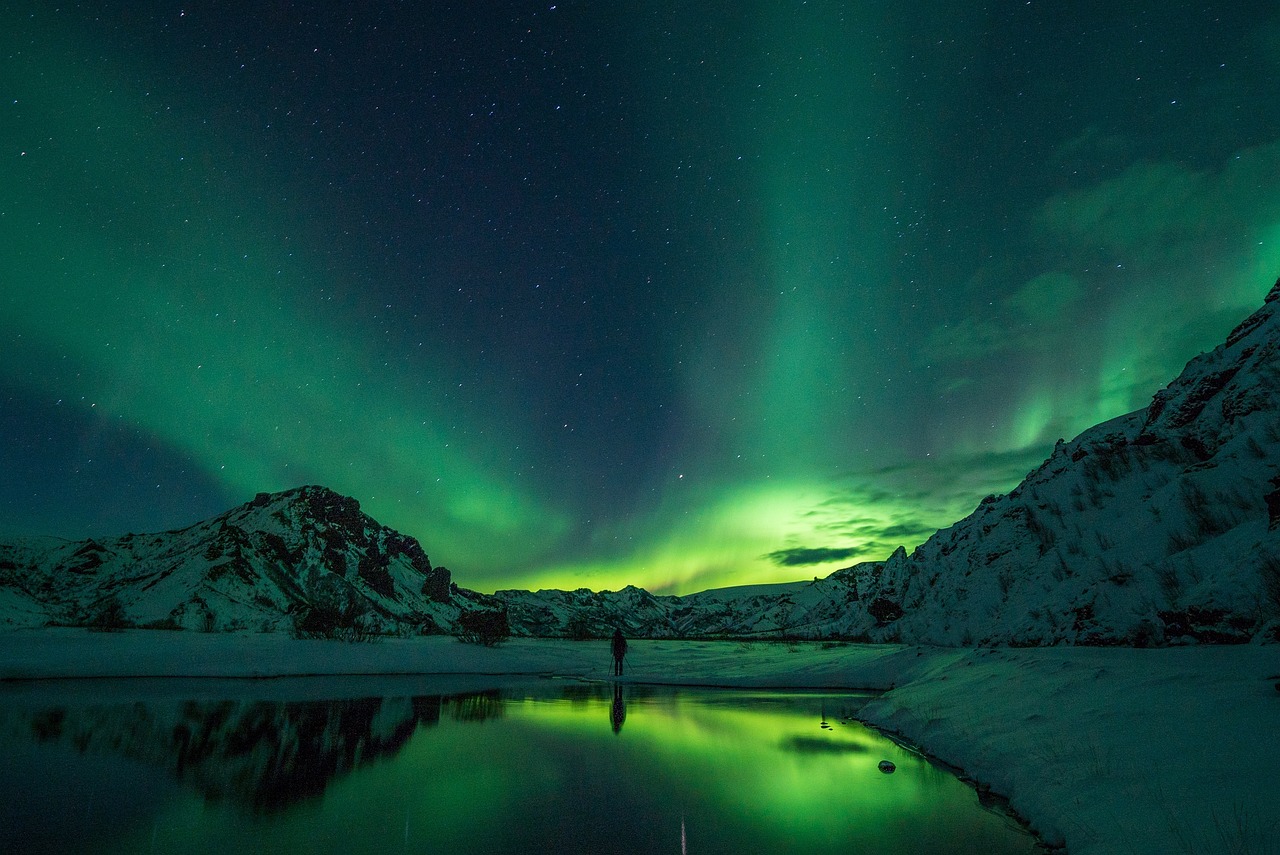
Look for interesting landscape features that will add depth and context to your celestial images—ancient trees, rock formations, abandoned structures, or bodies of water that can reflect starlight. Note the terrain’s challenges, such as uneven ground, cliffs, or wildlife concerns. Mark GPS coordinates and identify safe pathways you’ll navigate in darkness.
⭐ Timing Your Astrophotography Adventure Perfectly
Timing determines which celestial phenomena you’ll capture and how successfully you’ll photograph them. Multiple temporal factors intersect in night sky photography, from seasonal Milky Way visibility to lunar phases and astronomical events.
Moon Phase Considerations
The moon’s brightness dramatically impacts astrophotography possibilities. New moon periods (when the moon is invisible) provide the darkest skies ideal for deep-sky objects and Milky Way photography. The week surrounding the new moon offers optimal conditions.
Conversely, moonlit landscapes create ethereal scenes with illuminated foregrounds and visible star fields—a different aesthetic worth exploring. Plan according to your creative vision, checking lunar calendars well in advance of your shoot.
Seasonal Milky Way Visibility
The Milky Way’s galactic core, the most photogenic section, remains visible from March through October in the Northern Hemisphere. Peak visibility occurs during summer months (June-August) when the galactic core rises highest above the horizon during nighttime hours.
During winter months, the Milky Way’s less dramatic outer regions remain visible, offering different photographic opportunities with winter constellations like Orion dominating the night sky.
Weather and Atmospheric Conditions
Clear skies are obviously essential, but atmospheric transparency matters equally. High humidity creates haze that diminishes contrast and star visibility. Cold, dry nights following weather fronts often produce the sharpest, clearest skies.
Monitor weather forecasts meticulously, paying attention to cloud cover predictions, humidity levels, and wind speeds. Several weather services and apps specialize in astronomical forecasting, predicting sky transparency and seeing conditions specifically for stargazers and astrophotographers.
Essential Equipment for Night Sky Photography
While you don’t need the most expensive gear to begin astrophotography, certain equipment characteristics significantly impact your results. Understanding what makes cameras and lenses suitable for night sky work helps you maximize your current equipment or make informed purchasing decisions.
Camera Body Requirements
Manual exposure control is non-negotiable for astrophotography. Your camera must allow manual settings for shutter speed, aperture, and ISO. Full-frame sensors generally outperform crop sensors in low-light conditions due to larger individual pixels that gather more light and produce less noise at high ISO settings.
However, modern crop-sensor cameras with good high-ISO performance can produce excellent results. Look for cameras with strong ISO 3200-6400 performance, as you’ll frequently shoot in this range. Live View functionality helps with precise manual focusing on stars.
Selecting the Right Lenses
Wide-angle lenses with fast maximum apertures (f/2.8 or wider) serve as astrophotography workhorses. Wide focal lengths (14-24mm on full-frame, 10-16mm on crop sensors) capture expansive sky sections and minimize star trailing during longer exposures.
Fast apertures allow more light to reach your sensor during short exposures, enabling you to capture faint stars and nebulosity while keeping individual stars sharp rather than trailed. Prime lenses often deliver superior optical quality compared to zoom lenses at similar price points, with less coma (star distortion in frame corners).
Critical Accessories
A sturdy tripod is absolutely essential—any camera movement during long exposures creates blur. Choose tripods with reliable leg locks and heads that securely hold your camera’s weight without drift.
Remote shutter releases or intervalometers prevent camera shake from pressing the shutter button. Many cameras offer built-in interval timers or can connect to smartphone apps for remote control. Extra batteries are crucial since long exposures and cold temperatures drain batteries rapidly. Bring at least two fully charged spares.
Red LED headlamps preserve your night vision while allowing you to adjust settings and navigate safely. White light destroys the dark adaptation your eyes develop after 20-30 minutes in darkness, making it harder to see your subject and compose shots.
🎯 Mastering Camera Settings for Sharp Stars
Astrophotography requires specific camera settings that differ dramatically from typical photography. Understanding these technical parameters and how they interact helps you capture sharp, well-exposed celestial images.
The 500 Rule and Exposure Time
The 500 Rule provides a starting point for calculating maximum shutter speed before stars begin trailing noticeably. Divide 500 by your lens’s focal length (using full-frame equivalent) to determine the longest exposure in seconds.
For example, with a 20mm lens on a full-frame camera: 500 ÷ 20 = 25 seconds maximum exposure. With modern high-resolution sensors, many photographers use the 400 Rule or even 300 Rule for sharper results. Experiment to find what produces acceptably sharp stars with your specific equipment.
Aperture and ISO Balance
Shoot at your lens’s widest aperture (lowest f-number) to gather maximum light. Most lenses perform best stopped down slightly, but in astrophotography, light-gathering ability trumps marginal sharpness improvements from smaller apertures.
ISO settings balance exposure brightness against digital noise. Start with ISO 3200, evaluating results and adjusting as needed. Higher ISOs (6400-12800) may be necessary in extremely dark locations or when shooting toward less light-rich sky sections. Modern noise reduction software can effectively manage noise in post-processing.
Achieving Precise Focus
Manual focusing on stars challenges even experienced photographers. Autofocus systems struggle in darkness, so manual focus is essential. Use Live View at maximum magnification, targeting the brightest star in your frame, and adjust focus until the star appears as the smallest, sharpest point possible.
Some photographers use infinity focus marks on lenses, though these aren’t always precisely accurate. Focus peaking features available on many cameras help by highlighting in-focus areas. Once achieved, secure your focus ring with gaffer tape to prevent accidental adjustments between shots.
Planning Tools and Applications for Astrophotographers
Modern technology offers powerful planning tools that take guesswork out of astrophotography preparation. Specialized applications help you visualize celestial positions, predict optimal shooting times, and scout locations virtually before investing time in physical travel.
Stargazing and Planning Apps
Augmented reality stargazing apps overlay constellation maps and celestial object positions onto your smartphone’s camera view, helping you understand where specific targets will appear in your sky at any given time. These tools prove invaluable for planning compositions that place the Milky Way core exactly where you want it relative to landscape features.
PhotoPills stands out as one of the most comprehensive planning tools for night sky photographers, offering detailed information about sun, moon, and Milky Way positions, along with augmented reality visualization and exposure calculators.
Star Walk 2 provides another excellent option for identifying celestial objects and understanding sky movements throughout the night, with an intuitive interface perfect for beginners.
Light Pollution and Weather Resources
Light Pollution Map websites and apps display global light pollution levels with exceptional detail, allowing you to identify dark sky locations near your position. Dark Sky Finder and similar tools provide mobile-friendly access to this crucial information.
Clear Outside and other astronomy-specific weather forecasting services predict cloud cover, transparency, and seeing conditions hours or days in advance, helping you decide whether conditions justify traveling to remote locations for your shoot.
🌌 Composition Techniques for Compelling Night Sky Images
Technical proficiency means nothing without strong composition. Celestial photography offers unique compositional challenges and opportunities that reward thoughtful scene construction.
Balancing Sky and Landscape
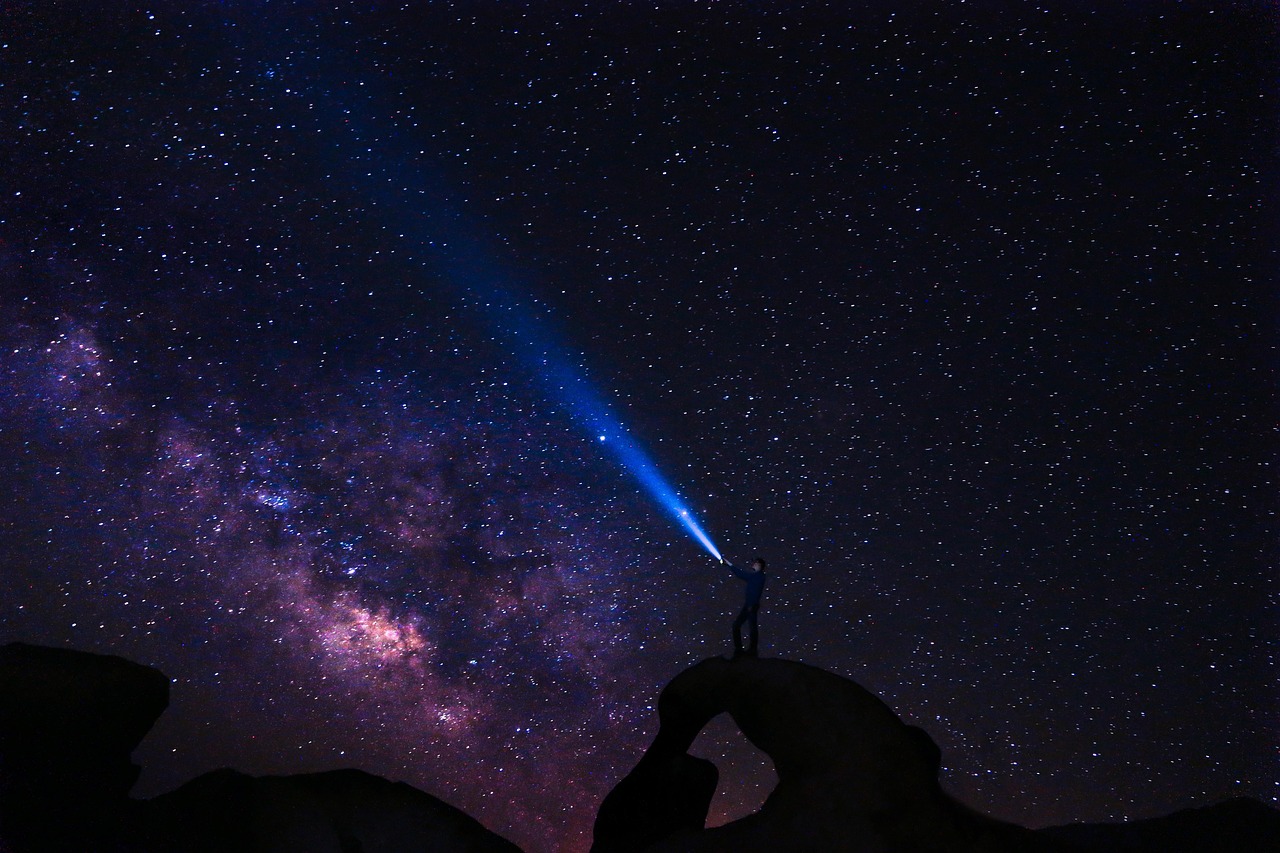
Purely celestial images can impress, but incorporating interesting foreground elements provides scale, context, and visual anchors that transform good photos into memorable images. The rule of thirds applies wonderfully to astrophotography—position horizon lines in the lower or upper third of your frame rather than dead center.
Consider sky-to-land ratios based on your primary subject. When the Milky Way is your hero, allocate two-thirds of your frame to the sky. For scenes where landscape elements shine, reverse this ratio while ensuring sufficient sky remains to establish the celestial context.
Leading Lines and Natural Framing
Roads, rivers, fence lines, and geological features create leading lines that guide viewers’ eyes through your composition toward the sky. Natural frames formed by tree branches, rock arches, or canyon walls add depth and focus attention on celestial elements.
Silhouetted foreground subjects work beautifully in night sky compositions, creating strong graphic elements that contrast with the star field. Position yourself where interesting shapes break the horizon line without completely dominating the frame.
Advanced Techniques for Exceptional Results
Once you’ve mastered basic astrophotography, advanced techniques open new creative possibilities and technical improvements worth exploring.
Panoramic Milky Way Shots
Stitching multiple frames into panoramas allows you to capture the Milky Way’s full arc from horizon to horizon or create ultra-high-resolution images impossible with single exposures. Shoot overlapping frames with 30-40% overlap between adjacent images, maintaining consistent settings across all frames.
Panoramic software like PTGui or Adobe Lightroom’s built-in panorama merge function aligns and blends these frames into seamless wide-angle masterpieces showcasing the night sky’s grandeur.
Stacking for Noise Reduction
Image stacking involves photographing the same composition multiple times with identical settings, then combining these frames in post-processing. This technique averages out random noise while reinforcing consistent signal (stars), producing cleaner images equivalent to much lower ISO settings.
Specialized stacking software like Sequator, StarStaX, or Starry Landscape Stacker automates this process, aligning stars across frames and intelligently blending the results while keeping foregrounds sharp.
Star Trails and Time-lapse Creation
Star trail photography captures Earth’s rotation as dramatic circular arcs centered on celestial poles. This technique requires series of consecutive exposures spanning 30 minutes to several hours. Intervalometers automate this process, triggering exposures continuously with minimal gaps.
These same image sequences can become mesmerizing time-lapse videos showing the night sky’s movement compressed into seconds, revealing celestial motion imperceptible to real-time observation.
Safety Considerations for Night Photography
Photographing in remote locations during darkness involves inherent risks that careful planning mitigates. Never compromise safety for a photograph—no image is worth injury or worse.
Inform someone of your location and expected return time before heading to isolated areas. Bring navigation tools including GPS devices or smartphone apps with downloaded offline maps, since cellular service may be unavailable. Carry extra warm clothing layers, water, snacks, and basic first aid supplies.
Be aware of local wildlife and potential hazards like cliffs, unstable terrain, or extreme temperature shifts. Scout locations during daylight to identify dangers that darkness conceals. Bring companions when possible, as groups enhance both safety and creative collaboration.
Post-Processing Your Night Sky Images
Raw files from night sky shoots require thoughtful post-processing to realize their full potential. Stars captured at high ISO with wide-open apertures need careful development to balance noise reduction with detail preservation.
Start with basic adjustments: white balance correction to neutralize color casts, exposure fine-tuning, and contrast enhancement. Increase clarity and dehaze moderately to make the Milky Way pop without creating unnatural appearances. Reduce luminance noise carefully to clean up grainy skies while preserving star definition.
Selective adjustments using gradient filters or masks allow you to process sky and foreground independently, applying different noise reduction, sharpening, and tonal adjustments to each. Subtle vibrance increases can enhance the Milky Way’s subtle color variations—blues, magentas, and yellows that distinguish different stellar populations and dust clouds.
🚀 Embarking on Your Stellar Photography Journey
The universe awaits your creative interpretation, offering endless photographic possibilities that combine technical challenge with profound beauty. Each night sky session teaches valuable lessons about light, composition, and patience while connecting you with the cosmos in uniquely meaningful ways.
Start with realistic expectations—your first attempts may not rival experienced astrophotographers’ portfolios, and that’s perfectly normal. Each outing improves your technical skills and compositional instincts. The learning curve is steep initially but becomes progressively more rewarding as you develop intuition for celestial movements, optimal settings, and compelling compositions.
Join astrophotography communities online or locally to share images, exchange location tips, and learn from others’ experiences. These groups organize group shoots that combine safety benefits with creative inspiration and technical knowledge sharing. Many experienced astrophotographers generously share their expertise, helping newcomers avoid common pitfalls and accelerate their learning.
Remember that equipment doesn’t define successful astrophotography—knowledge, planning, and persistence matter far more than expensive gear. Many stunning celestial images have been captured with modest camera equipment by photographers who thoroughly understood their tools’ capabilities and the night sky’s rhythms.
As you develop your skills, you’ll find yourself drawn to specific aspects of night sky photography—perhaps the technical challenge of deep-sky imaging, the meditative quality of star trail photography, or the adventure of exploring remote dark sky locations. Follow these passions wherever they lead, continually challenging yourself with new techniques and targets.
The night sky has inspired humanity since our ancestors first gazed upward in wonder. Through astrophotography, you’re participating in this ancient tradition while using modern tools to capture and share the universe’s breathtaking beauty. Every clear night offers a fresh canvas, every location presents unique opportunities, and every season brings different celestial wonders into view. Your ultimate guide to planning the perfect night sky photography adventure begins now—get out there and master the stars! ✨